App installieren
So wird die App in iOS installiert
Folge dem Video um zu sehen, wie unsere Website als Web-App auf dem Startbildschirm installiert werden kann.
Anmerkung: This feature may not be available in some browsers.
Du verwendest einen veralteten Browser. Es ist möglich, dass diese oder andere Websites nicht korrekt angezeigt werden.
Du solltest ein Upgrade durchführen oder einen alternativen Browser verwenden.
Du solltest ein Upgrade durchführen oder einen alternativen Browser verwenden.
ML-Factory Gitarren-Bausätze – Selbstbau
- Ersteller FloGatt
- Erstellt am
-
- Schlagworte
- bausatz ml-factory selbstbau
wayne13
Registrierter Benutzer
- Zuletzt hier
- 30.06.13
- Registriert
- 01.04.09
- Beiträge
- 194
- Kekse
- 399
Ich habe eigentlich auch mal geplant so einen ML-Factory Bausatz zu holen (Nach meinem "richtigen" Eigenbauprojekt. Allerdings ist mir aufgefallen, dass einige Sachen nicht mehr erhältlich sind, zb. JEM oder Flying V Bausatz. Ist es bei ML normal, dass ab und zu mal was weg ist, weil die Vorräte weg sind, oder gibts die gar nicht mehr? JEM oder Flying V Bausatz wär schon geil
P
PrinceSanji
Registrierter Benutzer
- Zuletzt hier
- 25.06.14
- Registriert
- 11.08.08
- Beiträge
- 353
- Kekse
- 315
ab ende februar wird bei der ML-factory wieder nachgereicht  bin mir sicher, dass die nicht einfach aus dem programm genommen werden....
fantom
Registrierter Benutzer
- Zuletzt hier
- 20.01.13
- Registriert
- 05.02.10
- Beiträge
- 25
- Kekse
- 0
Hallo fiddle, high kjaer,
danke for the answers. Ich bevorzuge, die stege zu verlegen, weil ich mir bei der Stabilität der Hälse nicht so sicher bin. Das Loch für's Tremo 'n bischen ausfeilen, wenn nötig. Hab beim Testen gemerkt, dass die Potis kratzen und bei der 6er die hohe E-Saite irgendwas zum Schwingen bringt. Ich vermute die Federn vom Tremo. Mal in Leinen Wickeln und gucken, was passiert. Bei den Poti's werde ich mir wohl push/push-Poti's zulegen wegen der schnelleren Umschaltung. Am WE hab in nen Kasten für die Hydra gebaut. Ein Softbag wollte ich nicht mehr. 30 für's Material und einen Tag Arbeit, Ä-Woala(oder wie das heisst).
Ich hab ja versucht, Bilder hochzuladen, bin aber wohl zu blöd dazu. Ladebalken voll ausgemalt und Stillstand bis zum Feierabend. Gibts da nen Trick?
Toni
danke for the answers. Ich bevorzuge, die stege zu verlegen, weil ich mir bei der Stabilität der Hälse nicht so sicher bin. Das Loch für's Tremo 'n bischen ausfeilen, wenn nötig. Hab beim Testen gemerkt, dass die Potis kratzen und bei der 6er die hohe E-Saite irgendwas zum Schwingen bringt. Ich vermute die Federn vom Tremo. Mal in Leinen Wickeln und gucken, was passiert. Bei den Poti's werde ich mir wohl push/push-Poti's zulegen wegen der schnelleren Umschaltung. Am WE hab in nen Kasten für die Hydra gebaut. Ein Softbag wollte ich nicht mehr. 30 für's Material und einen Tag Arbeit, Ä-Woala(oder wie das heisst).
Ich hab ja versucht, Bilder hochzuladen, bin aber wohl zu blöd dazu. Ladebalken voll ausgemalt und Stillstand bis zum Feierabend. Gibts da nen Trick?

Toni
kjaer
Registrierter Benutzer
Most of the stuff for my guitar has arrived. Take a good look at all that beautiful gold hardware
I still need the pickups and electronics from Leosound, but that will arrive in a couple of weeks (I guess)
The neck does not fit as tight as I want, so I wil have to work a little on the neckpocket to get a tight fit. I am not sure if I can fix it, or I will have to glue in a block of wood and make a new routing.
I decided to change the dotmarkers in the neck to something diamond or sort of teardropshaped. I think that is a wise decision, because the dot on 5th fret is app. ½mm lower than the fingerboard. It will never get to neither feel nor look good.
As I allready knew, the frame for the bridge pickup can't cover the original tele routing. I plan to glue in a piece of wood and angle it so that the lines in the wood goes in the same direction. Because I have chosen to install a tremolo I will get a little block of wood when I cut out the hole for the tremolo. Anyway I hope that little repair won't be much visible between the bridge pickup and the tremolo.
next step: shaping the body with the angled top for right arm and the "tommy-cut" like the contour-shape of a strat
regards
Soren
Denmark
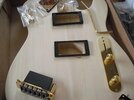
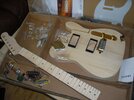

I still need the pickups and electronics from Leosound, but that will arrive in a couple of weeks (I guess)
The neck does not fit as tight as I want, so I wil have to work a little on the neckpocket to get a tight fit. I am not sure if I can fix it, or I will have to glue in a block of wood and make a new routing.

I decided to change the dotmarkers in the neck to something diamond or sort of teardropshaped. I think that is a wise decision, because the dot on 5th fret is app. ½mm lower than the fingerboard. It will never get to neither feel nor look good.
As I allready knew, the frame for the bridge pickup can't cover the original tele routing. I plan to glue in a piece of wood and angle it so that the lines in the wood goes in the same direction. Because I have chosen to install a tremolo I will get a little block of wood when I cut out the hole for the tremolo. Anyway I hope that little repair won't be much visible between the bridge pickup and the tremolo.
next step: shaping the body with the angled top for right arm and the "tommy-cut" like the contour-shape of a strat
regards
Soren
Denmark


Mountainbikemike
Registrierter Benutzer
schönes Teil,echtMost of the stuff for my guitar has arrived
 jetzt kommts nur noch drauf an was man draus macht
Vintage_Man
HCA Elektronik, Röhrentechnik
Nach langem gefiedele ist nun auch mein J-Modell ein gutes Stück vorangekommen. Der Body ist lackiert, wird aber, nachdem alles angepasst und justiert ist, noch einmal ganz auseinandergenommen, feingeschliffen und poliert.
Der Hals sitzt schon sehr gut, braucht aber noch ein leichtes Shimming, damit die Bridge auf eine justable Höhe kommt. Die Bünde habe ich bereits kräftig nachgearbeitet und hochglanzpoliert. Die hatten es bitter nötig!
Was sonst noch muss: Ausfräsung für das Tremolo nochmals erweitern; das passt immer noch nicht richtig. Decal für den Headstock aufkleben und d'rüberlackieren. PUs anders befestigen. Das mit den Schrauben und den Federn im Body ist viel zu labberig. Andere Saiten aufziehen. Zum probieren und justieren sind die beigelegten gut, für mehr aber auch nicht.
Die Tuner habe ich bereits gegen Kluson Locking Tuners ausgetauscht und den Plastiksattel durch einen Knochensattel ersetzt. Sehr wichtig war der sofortige Austausch der Halsschrauben. Die beigelegten Schrauben sind übelster China-Mist und reissen sehr schnell ab.
Und so sieht's per heute aus:
Anhang anzeigen 139953
fantom
Registrierter Benutzer
- Zuletzt hier
- 20.01.13
- Registriert
- 05.02.10
- Beiträge
- 25
- Kekse
- 0
guitarplayer91
Registrierter Benutzer
So nun gibts von mir auch ein Update!
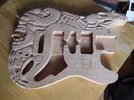
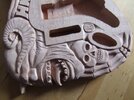
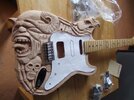
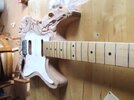
Der Bausatz ist heute Morgen angekommen, alle Teile sind dabei nur die Mechaniken sind die falschen, es sind 10mm Mechaniken ich habe aber 8mm Löcher im Hals, ich kann aber die Tage in einer Werkstatt sie aufbohren mit einem passenden Senker!
Morgen sollte dann auch mein Matthias Koch Buch kommen dann gehts los mit schleifen, schleifen, schleifen, schleifen
Hier die Bilder:
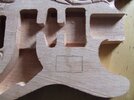
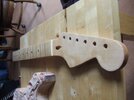
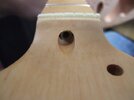
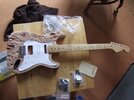
Grüße,
felix
Der Bausatz ist heute Morgen angekommen, alle Teile sind dabei nur die Mechaniken sind die falschen, es sind 10mm Mechaniken ich habe aber 8mm Löcher im Hals, ich kann aber die Tage in einer Werkstatt sie aufbohren mit einem passenden Senker!
Morgen sollte dann auch mein Matthias Koch Buch kommen dann gehts los mit schleifen, schleifen, schleifen, schleifen

Hier die Bilder:


Grüße,
felix
Vintage_Man
HCA Elektronik, Röhrentechnik
kjaer
Registrierter Benutzer
hallo Vintageman
looks really proff!!!
Please give me some details about making your own decals. Are they made on a laser or inkjet printer?
are they the waterslide type? If yes - for how long do they have to dry before spraying with laquer?
Please tell how it's made
regards
Soren
Denmark
looks really proff!!!
Please give me some details about making your own decals. Are they made on a laser or inkjet printer?
are they the waterslide type? If yes - for how long do they have to dry before spraying with laquer?
Please tell how it's made
regards
Soren
Denmark
Vintage_Man
HCA Elektronik, Röhrentechnik
Sure, will do!
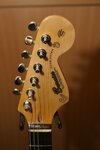
The graphic has been made with CorelDraw! but any other similar program will do the same. The original graphic has been mirrored and been printed out onto a transparent slide for inkjet printers. Of course a tranparent slide for a laser printer works exactly the same.
Then the outlined logo has been filled using a gold-ink pen (Edding or similar).
With the print side to the front I have sprayed glue (Pattex, ....) over the decal and glued it onto the headstock. Using a piece of paper rub firmly against the wood.
Next step - not jet done - is spraying a new layer of laquer over the frontside of the headstock to seal the decal and after some polishing giving the headstock its final brilliance.
To answer your question: Drying time is only a few minutes between the different steps.
That's all!
Und auf Deutsch:
Die Grafik habe ich mit CorelDraw! erstellt, es tut aber auch jedes andere ähnliche Grafikprogramm. Die originale Grafik habe ich gespiegelt und auf eine Overheadfolie für Tintenstrahldrucker aufgedruckt. Das funktioniert mit Folien für Laserdrucker genauso.
Dann habe ich das Logo (Outline Font) mit einem goldfarbenen Filzstift (Edding, ....) ausgefüllt.
Mit der bedruckten Seite nach oben dann das Decal mit Sprühkleber eingenebelt und auf den Headstock geklebt. Mit einem Schutzpapier gut anreiben.
Der nächste Schritt - soweit bin ich noch nicht - ist eine zusätzliche Lage Klarlack, um damit das Decal zu versiegeln und nach weiterer reichlicher Politur, dem Headstock seinen finalen Glanz zu geben.
Um die Frage zu beantworten: Die Trockenzeit ist jeweils nur im Bereich weniger Minuten zwischen den Schritten.
Das ist alles!
/V_Man
kjaer
Registrierter Benutzer
shit shit shit!!!
Just went for a walk with the dog - suddenly I found myself lying on the street with awfull pain in my right hand. I guess I'll have to see the doc tomorrow. Don't think I can work much on the "axe" the next days
Vintageman thank you - but you do not have to answer in english. I read and understand german quite well, but the german grammar is a bit too dificult for me.
regards
Soren
Denmark
curlee
Registrierter Benutzer
shit shit shit!!!
Just went for a walk with the dog - suddenly I found myself lying on the street with awfull pain in my right hand. I guess I'll have to see the doc tomorrow. Don't think I can work much on the "axe" the next days
Vintageman thank you - but you do not have to answer in english. I read and understand german quite well, but the german grammar is a bit too dificult for me.
regards
Soren
Denmark
Hallo kjaer,
das ist wirklich shit

Ich wünsche dir gute Besserung u. das es mit deiner Hand nicht so schlimm ist wie es im Moment aussieht.
Viele Grüsse from Austria
Curlee
P
PrinceSanji
Registrierter Benutzer
- Zuletzt hier
- 25.06.14
- Registriert
- 11.08.08
- Beiträge
- 353
- Kekse
- 315
ihr mit euren decals 
ich hatte einfache injekt-folie, mim laserdrucker schwarz ruff mit un gut iss! dann als schutz ein teil der injektfolie auf den bedruckten teil, ausgeschnitten, ruff uffn hals und gesprüht (acryllack. zum glück hab ich vorher getestet, wie sich farben auf der folie mit dem lack vertragen - garnicht!
 alles verlaufen! na, dann hab ich einfach eine zweite drauf, denn die folie blieb unversehrt...)
iss nur a weng dick worn... naja, macht mir aber nix aus, von daher....
edit: sorry, war schnell geschrieben, daher der mix-dialekt kanns ausbessern, wenn ihr wollt
edit2: bevor ichs vergess: body is mit acryl-spray jetzt pastellweiß und der hals hat schon ne schicht acryl klarlack.
wird also wohl donnerstag/freitag fertig werden! am samstag werden dann wohl die neuen mechaniken kommen... (kluson... einwände? weitere vorschläge zur veränderung? (noch nicht bestellt, passiert noch innerhalb der nächsten paar stunden...))

ich hatte einfache injekt-folie, mim laserdrucker schwarz ruff mit un gut iss! dann als schutz ein teil der injektfolie auf den bedruckten teil, ausgeschnitten, ruff uffn hals und gesprüht
 (acryllack. zum glück hab ich vorher getestet, wie sich farben auf der folie mit dem lack vertragen - garnicht!
iss nur a weng dick worn... naja, macht mir aber nix aus, von daher....

edit: sorry, war schnell geschrieben, daher der mix-dialekt
 kanns ausbessern, wenn ihr wollt
edit2: bevor ichs vergess: body is mit acryl-spray jetzt pastellweiß und der hals hat schon ne schicht acryl klarlack.
wird also wohl donnerstag/freitag fertig werden! am samstag werden dann wohl die neuen mechaniken kommen... (kluson... einwände? weitere vorschläge zur veränderung? (noch nicht bestellt, passiert noch innerhalb der nächsten paar stunden...))
Vintage_Man
HCA Elektronik, Röhrentechnik
....wie sich farben auf der folie mit dem lack vertragen - garnicht!
Siehste! Deswegen habe ich das Dings ja spiegelverkehrt ausgedruckt, womit die bedruckte Fläche unten liegt und somit der Lack keinen Schaden anrichten kann.
/V_Man
P
PrinceSanji
Registrierter Benutzer
- Zuletzt hier
- 25.06.14
- Registriert
- 11.08.08
- Beiträge
- 353
- Kekse
- 315
naja, blöde nur, wenn eine seite eben klebend ist  das war wohl der unterschied!
Ähnliche Themen
- Antworten
- 1
- Aufrufe
- 9K
- Antworten
- 83
- Aufrufe
- 28K
- Antworten
- 100
- Aufrufe
- 31K
G
- Antworten
- 17
- Aufrufe
- 4K
G
- Antworten
- 4
- Aufrufe
- 6K
Quick Links
-

Aus der Asche: Restauration einer Les Paul nach Drohnenangriff
- Gestartet von Cryin' Eagle
- Antworten: 19
- Modifikation, Technik, Gitarrenbau
-
C
Mein erstes Gitarrenkit-Projekt
- Gestartet von cirex
- Antworten: 84
- Modifikation, Technik, Gitarrenbau
-

Warum gibt es keine Strat mit Bundblech als 24. Bund?
- Gestartet von poor but loud
- Antworten: 90
- Modifikation, Technik, Gitarrenbau
Unser weiteres Online-Angebot:
Bassic.de · Deejayforum.de · Sequencer.de · Clavio.de · Guitarworld.de · Recording.de

Bassic.de · Deejayforum.de · Sequencer.de · Clavio.de · Guitarworld.de · Recording.de


